
How to Choose an Ossur Unloader Knee Brace in 2026?
Choosing an ossur unloader knee brace in 2026 starts with understanding what you need it to do. These braces are designed to reduce pressure on one side of the knee, often for people with unicompartmental osteoarthritis. The right choice depends on more than the brand name. It should match your diagnosis, activity level, leg shape, and daily routine.
Fit matters. A brace that slips during a short walk may be frustrating by lunchtime. A model that feels secure in a clinic might rub behind your knee when you sit. Small details count. Ask a qualified clinician or orthotist to help confirm the affected compartment, take measurements, and assess whether the brace suits your symptoms. Product features and sizing can vary, so check current manufacturer guidance rather than relying on an older review or a guessed size. Comfort is not a minor bonus.
This guide will help you compare brace styles, fitting considerations, adjustment needs, and questions to raise before buying. It will also distinguish general product information from advice tailored to your knee. No brace works perfectly for everyone. That is worth remembering. Even a well-fitted device may need adjustment, and some people need another treatment approach. Keep track of pressure points, skin irritation, and changes in pain, then share those observations with your healthcare professional. Choosing carefully takes a little patience, and the first fit may not feel quite right.
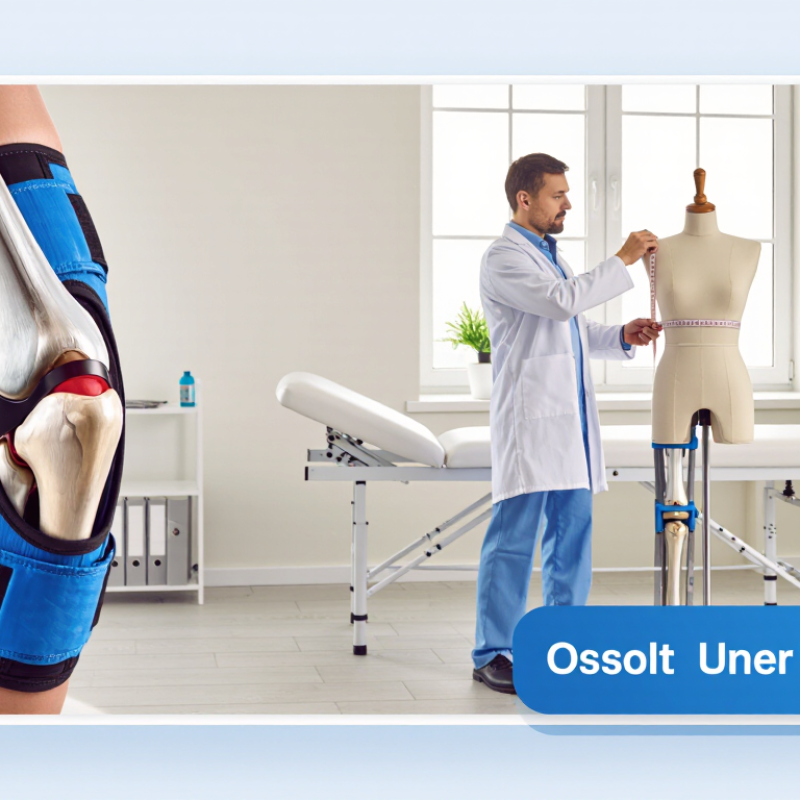
Understand How Össur Unloader Knee Braces Work
An unloader knee brace changes how force passes through the knee. Its rigid frame and adjustable straps create pressure at several points around the joint. For medial-compartment osteoarthritis, the brace typically applies a gentle outward force, shifting some load away from the inner side. A reverse setup may be used when the outer compartment is affected. It does not repair cartilage or permanently realign the leg. The goal is more modest: reduce painful loading during steps, stairs, or standing.
Fit matters. A 2015 meta-analysis in Arthritis Care & Research pooled randomized trials of valgus bracing for knee osteoarthritis. It reported small average improvements: standardized mean differences were −0.33 for pain and −0.22 for function. These are group averages, not a promise for one person. A brace that slips, pinches behind the knee, or feels bulky may be worn less, even if its mechanics are sound. Check that the hinges sit beside the knee joint and that the straps feel secure without causing numbness or skin irritation. A clinician can help match brace direction and adjustment to the affected compartment. The first fitting may feel awkward. That is worth reassessing.
Identify Your Knee Compartment and Unloading Needs
Begin by identifying which side of the knee is affected. Medial compartment problems involve the inner side; lateral problems involve the outer side. Pain location offers a clue, but it cannot confirm the cause. A clinician may combine an examination with weight-bearing X-rays to assess joint changes and leg alignment. This matters because an unloading brace must direct pressure away from the affected compartment, not simply squeeze the knee.
Think about when symptoms appear. Does pain build during a ten-minute walk, on stairs, or after standing at work? Note any giving-way, swelling, or limits on daily activities. These details help a clinician or orthotist judge how much support and unloading may be useful. Mild discomfort and frequent instability are not the same need. A brace should feel supportive, not painfully tight. Watch for rubbing behind the knee or red marks that persist after removal.
Fit can change the result. Bring the shoes you usually wear, and describe the surfaces where you walk most. Ask how to adjust the brace and when to check your skin, especially during the first few days. The right compartment may seem obvious, yet symptoms can shift or reflect more than one problem. Reassessment is sensible if pain worsens or the brace feels awkward.
How to read this chart: Medial-compartment symptoms are typically addressed with valgus-directed unloading; lateral-compartment symptoms with varus-directed unloading. The equal bar lengths are visual markers, not measurements of force or expected benefit. Confirm the affected compartment and brace fit with a qualified clinician.
Compare Össur Unloader Models and Features for 2026
Unloader knee braces differ in how they shift pressure away from an affected side of the joint. Rigid-frame models usually provide stronger leverage and may suit people who need a more noticeable unloading effect. Lightweight designs can feel less bulky under trousers, though some users find them less supportive during longer walks. A brace should match the affected compartment; medial and lateral knee pain may call for different adjustment directions.
Compare the frame, hinges, straps, and adjustment range—not just the product name. A low-profile frame may fit more easily beneath clothing, while wider straps can help spread pressure across the thigh and calf. Check whether the brace allows small fit changes as swelling or activity levels vary. Fit matters most. During a fitting, walk, sit, and climb a few steps; watch for slipping, pinching, or pressure behind the knee.
The right choice also depends on daily use. Someone walking on level ground may prefer a lighter setup, while uneven paths can make stability more important. Ask a qualified clinician to confirm sizing and unloading direction, especially after a change in pain or mobility. Product charts help, but they cannot replace a real fitting. And even a well-made brace can feel awkward at first; that part is easy to underestimate.
Select the Right Size and Fit
Choosing an unloading knee brace starts with measurements, not guesswork. Measure your thigh and calf where the fitting guide specifies, then compare both numbers with the current size chart. Keep the tape level and snug, but do not compress the skin. Follow the guide’s instructions about whether to measure standing or sitting. Small details matter. If your measurements fall between sizes, ask a qualified clinician or orthotist before choosing.
Try the brace over the clothing you expect to wear. Position its hinges beside the knee, and check that the center sits near your kneecap. Fasten the straps securely, not tightly. Walk a few steps, sit down, and stand again. Notice slipping, pinching, or pressure behind the knee. Do not fix slipping by simply pulling every strap harder. A chart can still leave you uncertain, and one fitting is only a snapshot: swelling, clothing, and brace position can change the feel. If numbness, persistent discomfort, or lasting skin marks occur, remove the brace and seek fitting advice. Ask a clinician to check alignment and adjustments, especially if the device’s unloading settings need review.
| Selection step | What to check | How to choose or adjust | Signs of a suitable fit |
|---|---|---|---|
| Confirm the unloading direction | Which knee compartment is affected and whether the leg alignment is varus or valgus. | Ask a healthcare professional to confirm the affected compartment and brace configuration. Unloader braces are designed to shift load away from a targeted side of the knee. | The brace is configured for the prescribed knee and unloading direction. |
| Take the required measurements | Measure the locations specified in the particular brace’s fitting guide. Depending on the design, these may include thigh, knee, and calf circumferences. | Use a flexible tape measure, keep it level and comfortably snug, and record measurements in the units requested by the size chart. Do not substitute another model’s chart. | Your measurements fall within the same size range for all required measurement points, or a fitter helps resolve any mismatch. |
| Choose the size | The exact size chart and measurement instructions for the selected brace model. | Select by measured dimensions rather than usual clothing size. If measurements sit between sizes or fall into different size ranges, ask the brace provider or clinician before choosing. | The frame and straps can be secured as instructed without excessive force, pinching, or loose movement. |
| Position the brace | The hinge and frame position relative to the knee joint, as shown in the fitting instructions. | Apply the brace to the correct leg and align it according to the model’s instructions. A clinician or trained fitter can check alignment and adjustment. | The brace stays in its intended position and does not obstruct comfortable knee bending or straightening. |
| Adjust the straps | Strap order, tension, and fastening points in the fitting guide. | Fasten and adjust straps in the prescribed sequence. Aim for secure contact without overtightening; do not change unloading settings unless instructed by a qualified professional. | The brace feels stable during movement, with no sharp pressure, numbness, or tingling. |
| Test movement and comfort | Comfort while standing, walking, and bending the knee within your prescribed activity limits. | Begin with a brief, cautious fit check and follow the wear schedule provided by your clinician or brace instructions. Recheck positioning after moving. | The brace does not slide, rotate, or create rubbing that worsens with movement. |
| Monitor skin and circulation | Skin beneath and around the brace, including areas near the edges and straps. | Check your skin after use, especially when first wearing the brace. Remove it and seek professional advice if you develop persistent pain, numbness, tingling, marked swelling, or skin damage. | No persistent pressure injury, unusual color change, or circulation-related symptoms occur. |
| Important: Sizing ranges and fitting steps vary by brace design. Use the size chart and instructions for the exact model, and consult a qualified healthcare professional for fitting or persistent discomfort. | |||
Review Clinical Guidance, Brace Adjustment, and Ongoing Care
Choosing an unloader knee brace starts with clinical assessment, not a size chart. The World Health Organization’s 2023 osteoarthritis fact sheet reports that about 528 million people had osteoarthritis in 2019; 365 million had knee involvement. That scale matters, but it does not mean one brace suits every knee. The American Academy of Orthopaedic Surgeons’ 2021 guideline includes tibiofemoral bracing for selected people with knee osteoarthritis, especially when instability or substantial disability is present. A clinician should check which compartment is affected, your alignment, and your walking goals.
Fit is practical work. A trained fitter can position the hinge near the knee joint line, then adjust the straps and unloading force while you stand and walk. Try a few steps and stairs, if safe. Small changes matter. A brace that slides, pinches, or leaves lasting red marks needs attention. Real life is messier: swelling and clothing can change the fit. A neat fit is not proof of benefit.
During the first weeks, note pain, walking tolerance, skin changes, and how long you wear it. The AAOS guidance supports bracing for selected patients; it does not promise relief for everyone. Keep the brace clean according to its care instructions, and ask your clinician about numbness, worsening pain, or persistent skin irritation. If your symptoms or body shape change, request a fit review rather than tightening every strap yourself.
Related Posts
-
Top Benefits of Using the Ossur Unloader Knee Brace for Pain Relief?
-

Best Ways to Treat Knee Arthritis Effectively?
-

Best Knee Replacement Options for Osteoarthritis Patients?
-
How to Choose Knee Replacement for Osteoarthritis?
-

How to Know If Osteoarthritis Needs Knee Replacement?
-
2026 Top Knee Braces for Bad Knees
DISCOVER THE POTENTIAL OF INNOVATIVE PROSTHETICS
From minor to severe injuries, our team develops advanced devices designed to support recovery and promote overall wellness.